

Table of Contents
As Christmas is almost upon us, our thoughts turn to gifting our loved ones something truly special. While selecting the perfect present is important, how it’s presented can elevate the entire experience. A beautifully wrapped gift conveys thoughtfulness and care before the contents are even revealed, making the moment of unwrapping all the more magical.
Of course, you might think, “Wrapping presents? That’s simple! Paper, tape, scissors – done!” But just as the perfect meal deserves a touch of plating finesse, a thoughtfully wrapped gift adds an extra layer of excitement and anticipation. Wrapping can be a creative expression, showcasing your unique style while reflecting the joy of the season.
From eye-catching designs to eco-friendly solutions, there are countless ways to make your gifts stand out. Whether you’re drawn to classic Christmas colours, rustic charm, or something truly unique, your choice of wrapping tells its own story.
If you’d like your Christmas presents to dazzle and make unwrapping part of the fun, our step-by-step guide is here to help. With easy-to-follow techniques and inspiring ideas, you’ll discover how to wrap with style and add personalised touches that will leave a lasting impression.
Seeking more ideas? Try our article setting a sweet table this Christmas for a truly unique idea.
Step 1: Assemble Your Items
Your Christmas present wrapping checklist:
- Gift to be wrapped,
- Wrapping paper,
- Sellotape (preferably double-sided),
- Scissors,
- Ribbon or raffia,
- Items to decorate (see below – e.g. foliage, candy canes, baubles),
- Florists wire, or if you can’t find any, string or thin ribbon,
- Name tag.
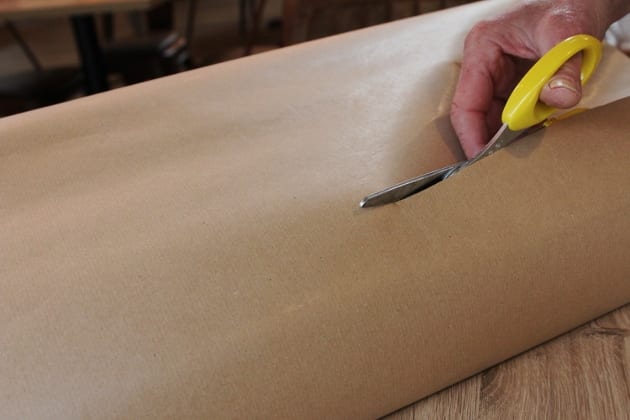
Step 2: Cut Paper to Size
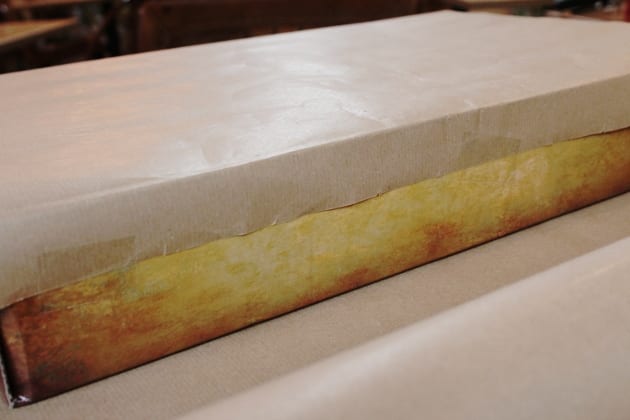
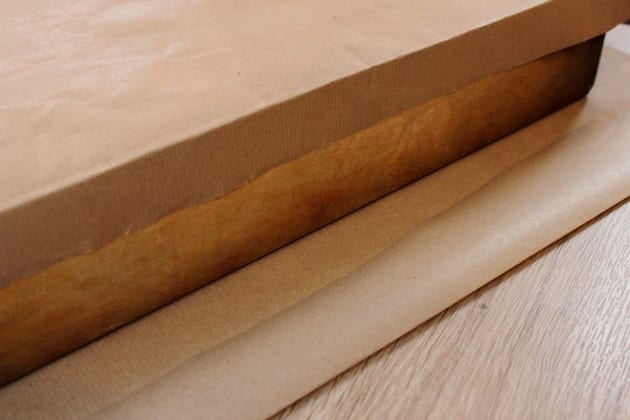
Lay your sheet or roll of wrapping paper decorative side down on the table and place your gift face down on top. Make sure there is enough paper at the width edges to cover.
Before cutting the wrapping paper, pull it firmly over the top of the gift and just over the other side. Sellotape the paper directly to the gift at this far edge to hold it in place. If your gift is a box shape, now go back and make very sharp creases where the wrapping paper folds over the gift edges.
Next, cut the paper. You want to leave enough length to create a small fold that will then neatly reach to the top of the gift.
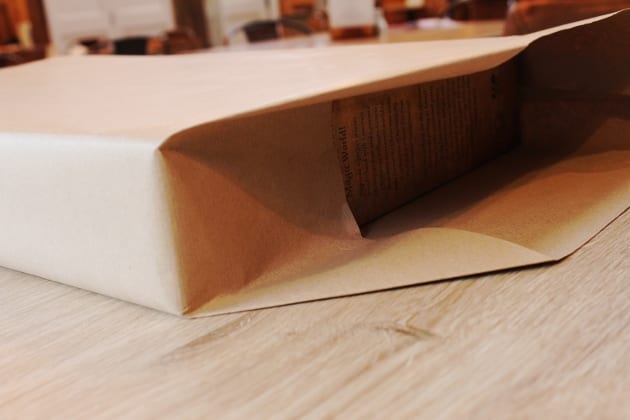
Step 3: Neatly Stick the Paper at the Length Edge

Do you usually wrap presents with Sellotape showing? It creates a much classier look if you keep any tape concealed. To do so, simply fold the wrapping paper to the top of length edge, make sure all creases are as sharp as you can make them, and stick by placing double-sided Sellotape on the inside fold of the wrapping paper.
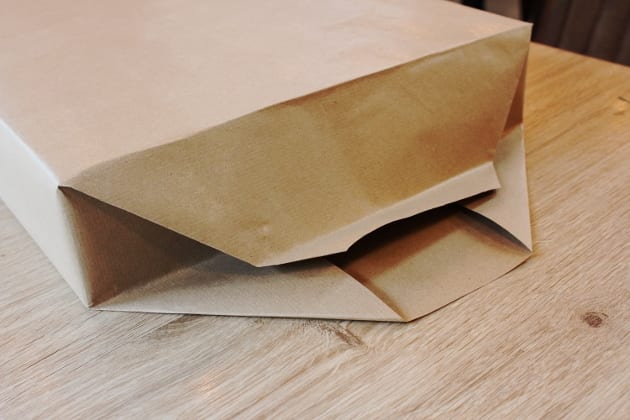
Step 4: Fold and Stick the Width Edges
To create a neat fold at the width edges, first fold the paper in on itself at both sides and create sharply folded angles.
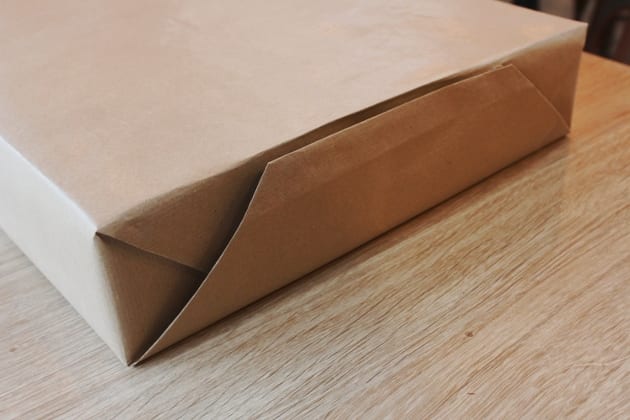
Then, bring the top side of the wrapping paper down, then the bottom side of the paper up and over to finish neatly at the present’s edge. Stick in place with double-sided Sellotape to avoid having any visible tape.
Pinch the present all over to make sure you have really sharp creases at all edges.
Step 5: Tie Your Ribbon Around
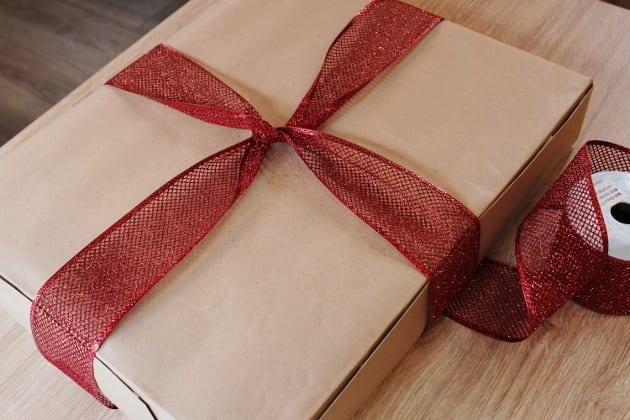
Take your roll of ribbon (we like thick, glittery ribbon but any variety will do here – raffia is also a great choice). First wrap it around the front of the gift, then crossover at the back.
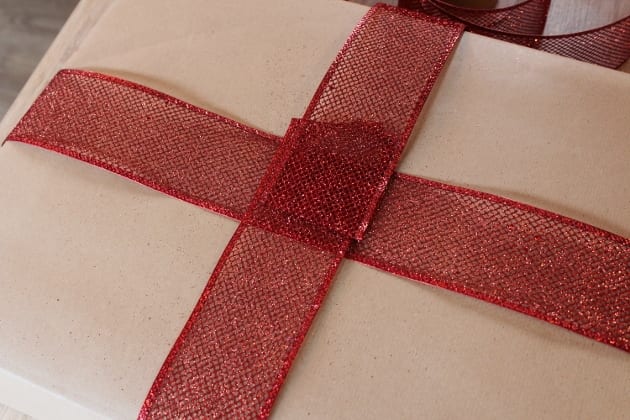
Bring the ribbon back round to the front, cut and stick in place using Sellotape.
Step 6: Create Your Bow
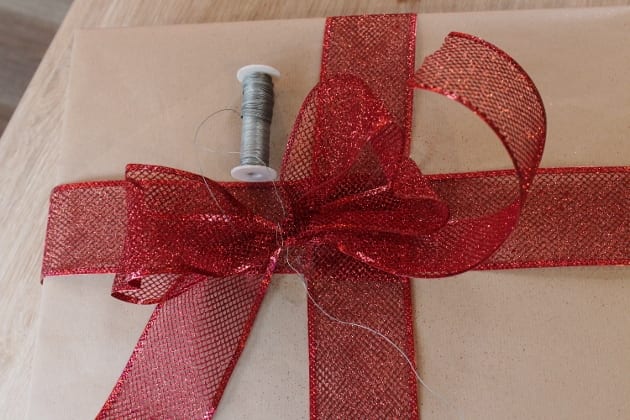
Using the same ribbon type as before, create a bow shape. Either stick or, if the material is too heavy gently wire in with florists’ wire / use string to fasten to the centre of the existing ribbon.
Step 7: Decorate and Let Your Imagination Run Wild!
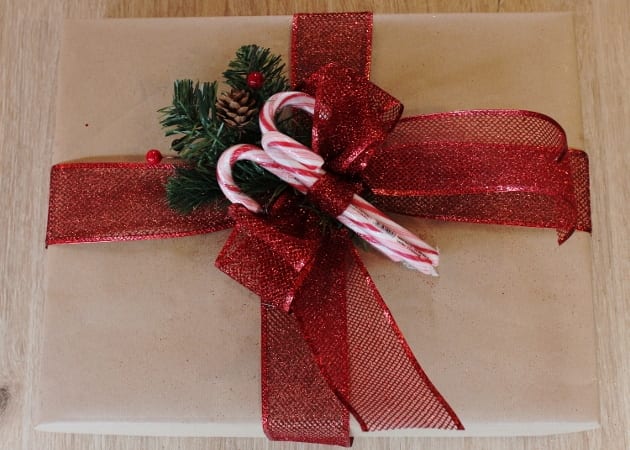
You now have the perfect base for any additional decorations you can imagine. These can all be gently tied or wired into the centre of the bow.
Why not try:
- Festive foliage and candy canes?
- Small tree decorations; fairies or woodland creatures.
- Baubles, with the name of the recipient and year written on in glass paint? This makes a lovely additional present for them to treasure and use every year on their Christmas tree.
All that’s left is to gently store your creations under your tree and enjoy the faces of the recipients as you hand them their beautiful Christmas presents that you wrap!