


A real Christmas tree may just not be for you and that’s okay! Artificial trees are a great way of introducing a realistic looking alternative into your home and are ideal for storing and reusing each year.
Visit your local Hillier Garden Centre or the Hillier Online Shop this Christmas and find an amazing range of artificial Christmas trees, including mini and full-size pre-lit trees.
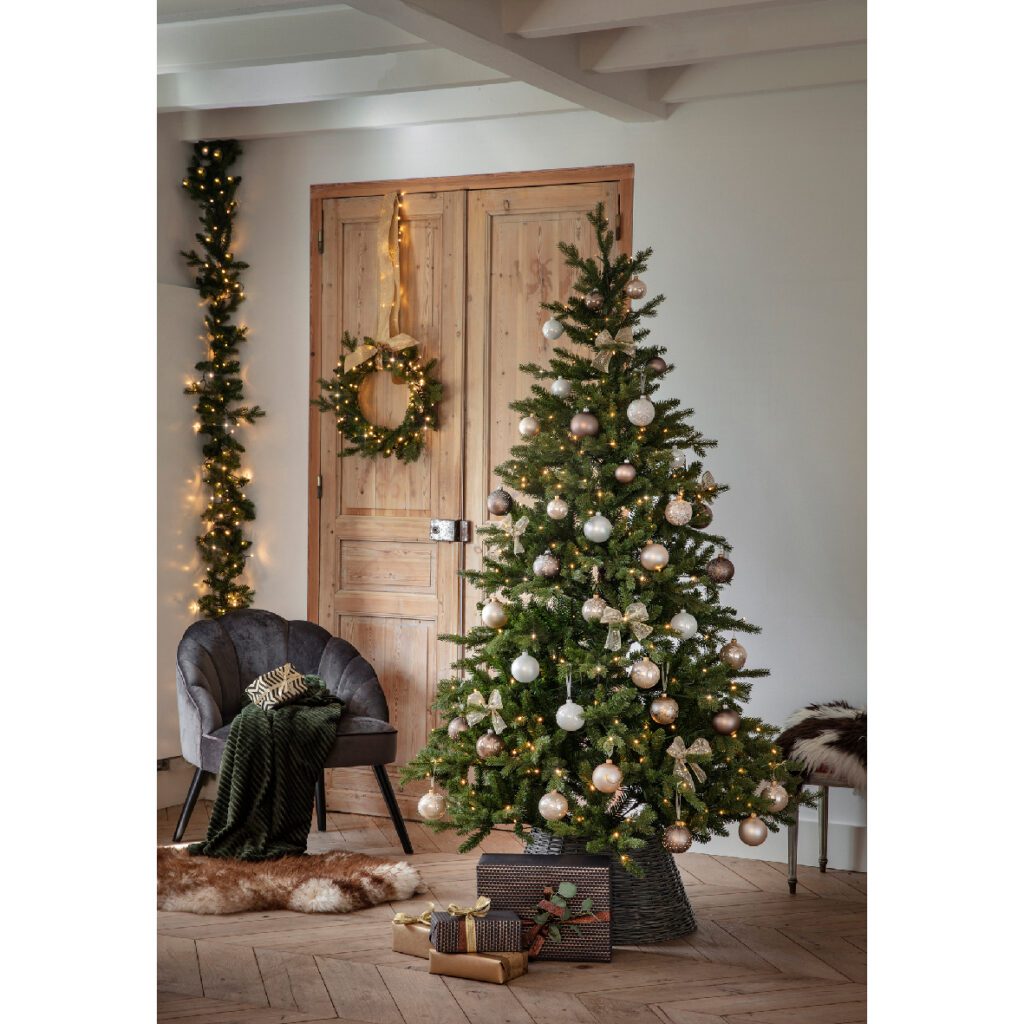
Artificial Christmas Trees
Allison from 6ft to 10ft . Available pre lit or snowy.
Tree Details
The Allison is an popular choice and these are a best seller. This traditional looking tree, with real looking yet soft needles is easy to assemble with it’s hinged branch structure.
For further information click here.
Pre-Lit Artificial Christmas Trees
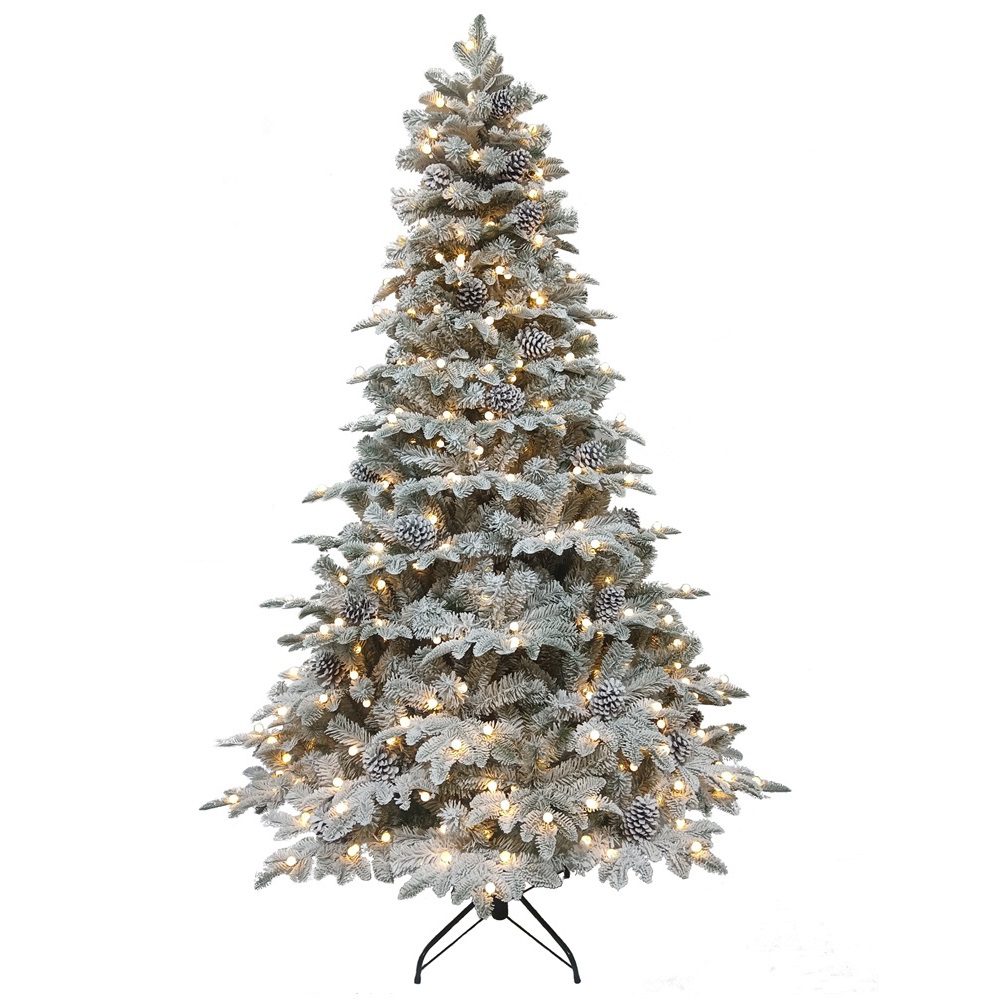
Arosa Snowy Pine Pre-lit Artificial Christmas Tree 7ft
Tree Details
The 7ft Arosa Snowy Pine Pre-lit Artificial Christmas Tree brings a touch of winter magic to your home. This premium, full-bodied tree is beautifully adorned with a frosted snowy finish, giving it a realistic, wintry appearance. Accented with natural-looking pinecones and pre-lit with warm white LED lights, it creates an inviting, festive glow. The Arosa Snowy Pine is designed to be the perfect centrepiece for your Christmas celebrations, offering a hassle-free setup while delivering the charm of a freshly snow-dusted tree. Ideal for any room, it brings timeless elegance to your Christmas décor.
How to Get Your Artificial Tree Looking its Best
Whether you are putting it up for the first or tenth time, every year you unpack your artificial tree there are some simple steps you can take to make the branches look at their fullest and most realistic. For smaller trees, you can shape all the branches when positioned on the tree. For tall trees, you may want to shape the top parts first to avoid having to stand on a ladder to do so.
1. Fan Out the Back Branches
Start the process of getting your tree to its best by taking each branch and working from the back end, closest to the tree trunk. Fan out the branches positioned closest to the tree trunk by gently shaping them upwards or sideways. These branches will also act to hide the tree trunk.
2. Move to the Mid Branch
Progress onwards down each branch. Separate out any branches coming off the sides of the main stem – not every artificial tree will have these.
3. Finish with the Tips
At the tip of the branch – the most visible part – continue to separate and spread each tip so the foliage resembles as closely as possible the natural movement of a real Christmas tree.
4. Work on the Total Shape from Bottom to Top
Now each individual branch has been beautifully shaped and are all positioned around your tree, start at the bottom and go up layer by layer all the way to the top to ensure each branch has been properly shaped. You may need a ladder for the top of taller trees; make sure it is firmly on the ground and ideally work with another individual to ensure it stays securely in place.
5. Step Back and Admire
Stand well back from your tree regularly while shaping to make sure you are happy with the overall effect. By doing so you can spot any areas that could use a little extra shaping. Once you are completely happy with the shape, begin the fun of decorating!

Why an artificial tree may be the right choice for you:
Reusable – the same tree can be used in your home every year
Tidy – there’s no need to water or clear up any dropped needles
Appearance – artificial trees can give the same illusion as real Christmas trees
Ease – artificial trees are easy to assemble, disassemble, and store
Safe – artificial trees will not cause the same allergies sometimes triggered by real trees